Configuring Amazon SES SMTP
In this lesson you will configure Amazon SES as an SMTP service for your WordPress server. You will verify your sending domain, set up the required DNS records for SPF, DKIM, and DMARC alignment, move your account out of sandbox mode, create SMTP credentials, and test the setup using Swaks.
Amazon SES
Amazon SES is an email service provider built for reliability, scalability and high volume. However, due to its pricing at 10 cents per 1000 emails, SES is great at serving smaller customers too. New AWS customers can also get up to 3000 emails per month for free for a whole year.
Included with SES is a trusted pool of sending IPs, bounce and complaint management, reputation metrics, guided SPF/DKIM/DMARC for your sending domain, and more.
This makes SES a great fit for transactional mail (password resets, account activation, order confirmations, etc.) for WordPress and WooCommerce, as well as transactional mail from any monitoring services on our server.
Marketing
You might be tempted to use the same system to send both marketing and transactional mail. While this will certainly work with Amazon SES, I highly recommend not doing so for a couple of reasons:
- Your sending domain reputation may cause transactional emails to be rejected or end up in spam
- High bounce/spam rates may put your AWS account at risk
If you'd like to send marketing emails using SES, you should create a separate AWS account and use a different sending domain.
Identity verification
Before SES will allow you to send email, you need to verify at least one
identity, which can be a single email address, or an entire domain. I will
verify my entire uncached.org domain.
Assuming you have already signed up for an AWS account
and logged in to your Console, select a region that's closest to your WordPress
server. Mine is us-west-1. Next, find the Amazon Simple Email Service from
their endless list of services on the top left, or by using the search bar.
You'll be greeted by a guided tour on setting up your first identity.

The first step in the guided tour is to verify your email address. This is not
the email address you would like to send email from, but rather an address that
you can receive email to. It can be a Gmail or any other address. I will use my
[email protected] address here.
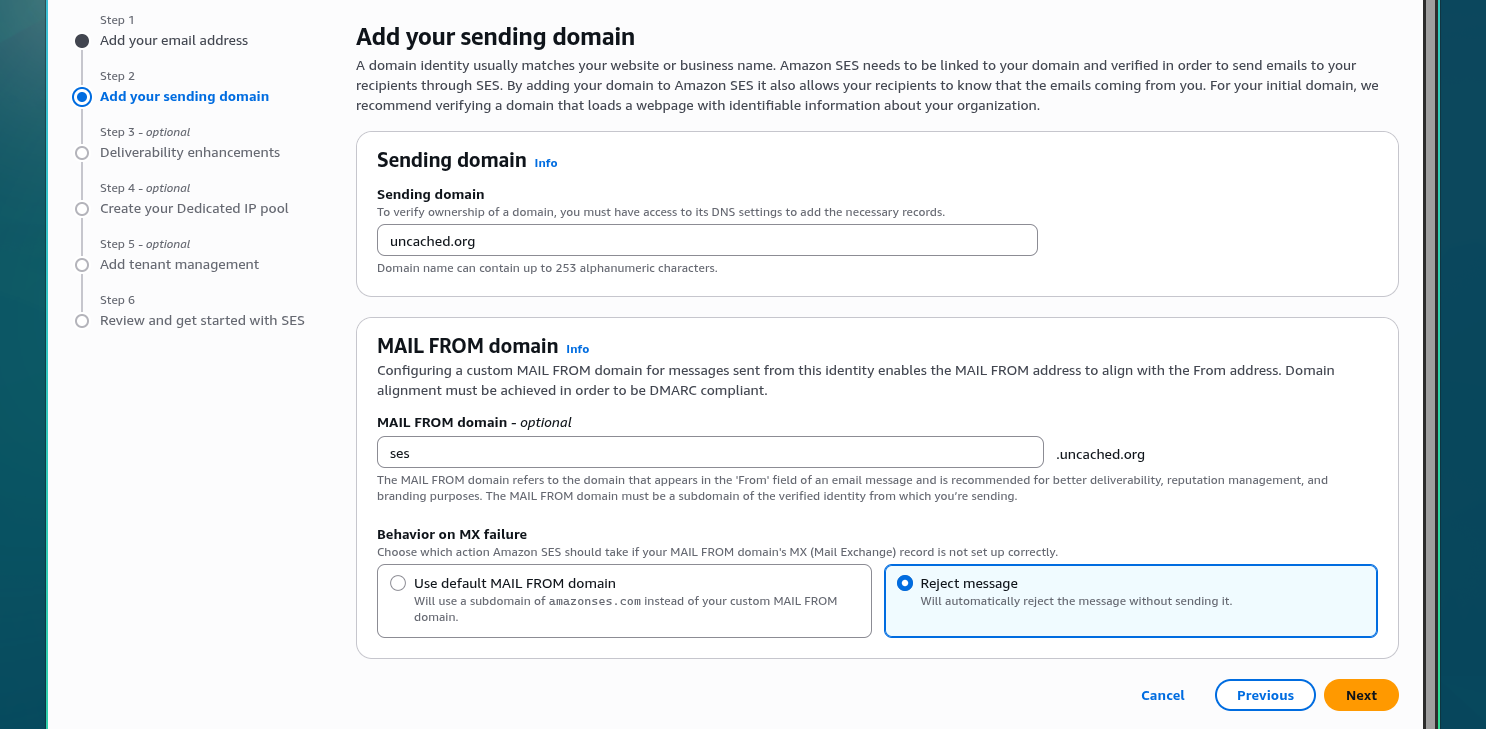
Since my goal is to send email from the [email protected] address, I'll use
uncached.org as the Sending domain, and I will also set ses.uncached.org
as the MAIL FROM domain, which is required for DMARC alignment. I'll also
choose to reject a message if the MX record for this subdomain is not set up
correctly.
Without DMARC alignment, the Return-Path or Bounce addresses on all emails
will be set to an amazonses.com domain. While this will still work, it may
slightly hurt deliverability, and is also not great for branding, as it will
cause many email clients to display a "via amazonses.com" label near the sender
address.
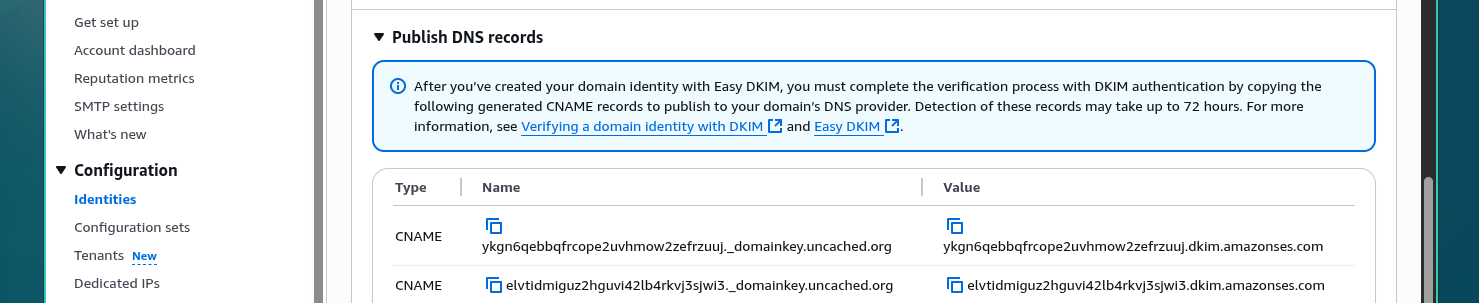
Feel free to skip all the optional steps, then head over to the Identities section in the SES dashboard, and open your sending domain identity. It may take a few minutes, but the DKIM, MAIL FROM, and DMARC sections should have new DNS records listed for you to configure at your DNS provider.
Let's add all these records to our Cloudflare DNS. Make sure that Proxy status is set to DNS only for these new records:
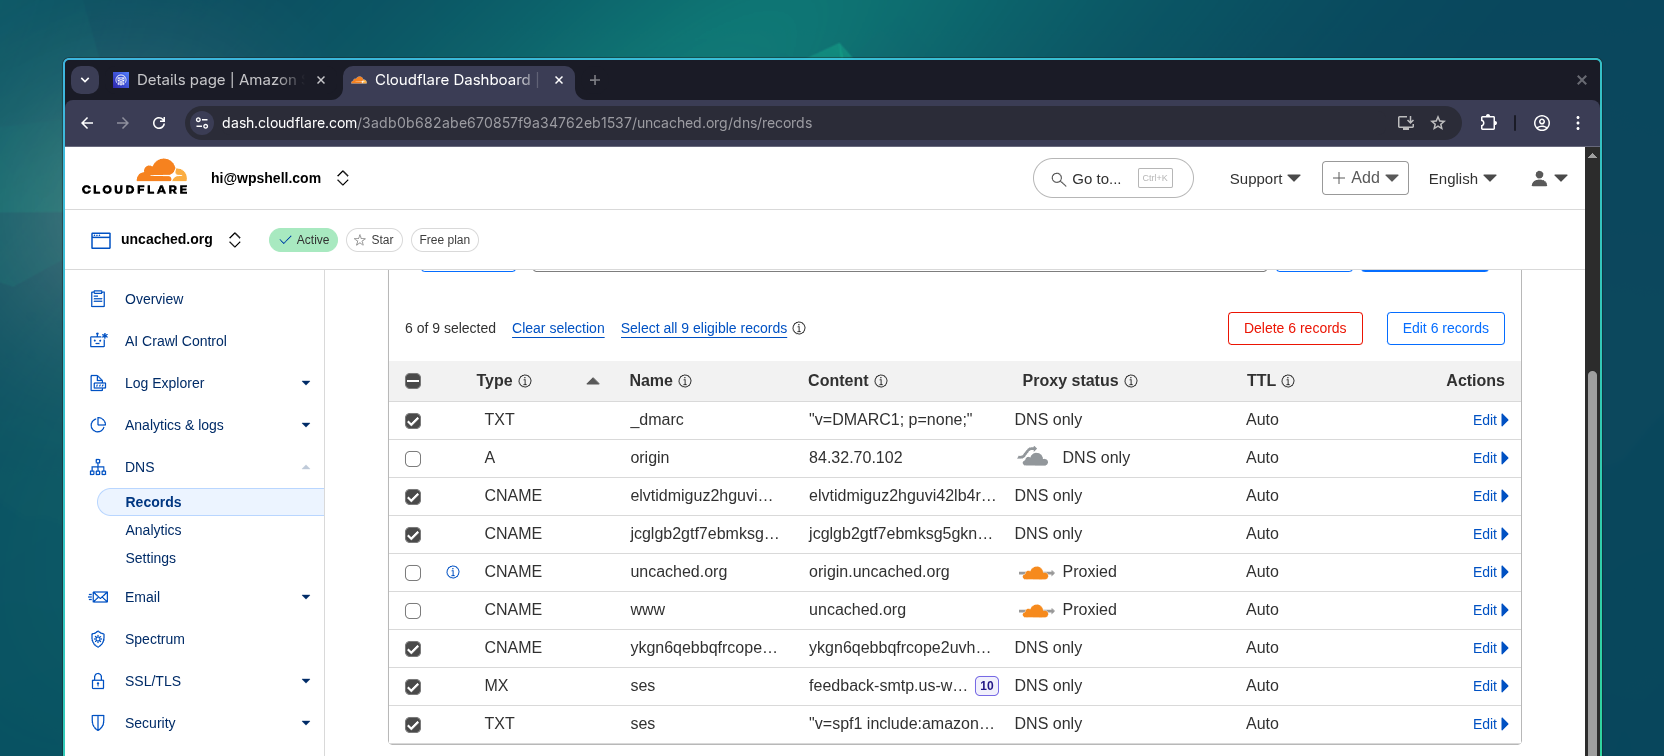
It may take a few minutes for the DNS changes to propagate and update your Amazon SES identity status. If everything was done correctly, the identity will soon be labelled as Verified. You should also get an email from AWS Health when things are ready to go.
This article is for premium members only. One-time payment of $196 unlocks lifetime access to all existing and future content on wpshell.com, and many other perks.