WordPress login bruteforce protection with Fail2ban
WordPress runs about 40% of all public websites. This means that by firing an HTTP request at wp-login.php on 1000 random domains, about 400 of them will respond. There is no other web-based software or CMS with this level of exposure.
Strong and unique passwords, as well as two-factor authentication, will help keep your WordPress dashboard accounts secure. However, the performance impact of such attacks can be quite severe, especially with limited compute resources, and a plugin-heavy website.
In this lesson we'll write a simple must-use plugin for WordPress, which will detect and log login failures. We'll then create a Fail2ban configuration to block these login attempts.
Why not use a third-party plugin
There are plenty of "bruteforce protection" plugins in the WordPress directory. Many of them even have commercial versions with monthly subscriptions.
The biggest downside is that they work in PHP land. Every login attempt is processed by loading WordPress, its active plugins and theme, running some checks in PHP, sometimes even consulting a remote third-party. Even requests from a "blocked" IP will need to bootstrap all of WordPress, just to be able to tell that the IP was "blocked."
This is extremely inefficient, especially if our goal is to reduce the performance impact of these attacks. These plugins may be suitable for environments where you have no other option.
With self-hosted WordPress, using server-level or even network-level tools for blocking, such as Fail2ban, Nginx and Cloudflare, is a much better approach.
Authentication in WordPress
WordPress has three endpoints for bruteforce attacks:
- The main authentication page at
wp-login.php - Various RPC calls through
xmlrpc.php - Application passwords via an HTTP header, typically through the REST API
Most attacks today are targeted against wp-login.php. It's pretty standard
across WordPress sites, hasn't changed in decades, and hardest to protect as
most users are expecting at least some legitimate traffic to that endpoint.
The xmlrpc.php endpoint used to be the easiest way to try hundreds of
passwords in a single request using the system.multicall RPC. This has been
patched since WordPress 4.4, however even with a single password attempt per
request, this endpoint remains quite popular. Popular publishing software and
WordPress plugins such as Jetpack still heavily rely on XML-RPC, so disabling it
can be quite challenging.
The third endpoint isn't a single URL. Application passwords are available for REST API endpoints, XML-RPC and other third-party APIs and implementations, such as GraphQL. This is not a very popular attack surface, but if successful, could be just as devastating as the others.
Logging failure
Let's create a new plugin for WordPress. We'll call it fail2ban.php and place
it under version control in our configuration repository in
/config/misc/fail2ban/fail2ban.php:
<?php
function wpshell_failed_login() {
    $ip = $_SERVER['REMOTE_ADDR'];
    $host = strtolower( $_SERVER['HTTP_HOST'] );

    openlog( 'wordpress', 0, LOG_AUTH );
    syslog( LOG_WARNING, "login-failed ip:{$ip} host:{$host}" );
    closelog();
}

add_action( 'wp_login_failed', 'wpshell_failed_login' );
add_action( 'application_password_failed_authentication', 'wpshell_failed_login' );
This plugin uses the wp_login_failed and
application_password_failed_authentication actions in WordPress to determine
when a user has provided an incorrect password. It will use the syslog
function to write the requester's IP address to the system log, which in our
case is the systemd journal.
Using the LOG_AUTH facility with our current configuration, we'll also be
writing that line to the auth.log file on the system. This is not strictly
necessary for Fail2ban, as it is capable of reading from the systemd journal
directly. However it may be convenient for quick lookups or other security
software integration.
I use my /config/bin/symlinks.sh script to symlink this plugin to individual
sites:
mkdir -p /sites/uncached.org/public_html/wp-content/mu-plugins
chown www-data:www-data /sites/uncached.org/public_html/wp-content/mu-plugins
ln -sfn /config/misc/fail2ban/fail2ban.php /sites/uncached.org/public_html/wp-content/mu-plugins/fail2ban.php
If you've followed the PHP configuration instructions in this course, your
individual sites should not have access to anything outside their own directory.
Given that our plugin lives in our /config repository, we'll need to
explicitly grant access for WordPress to be able to include our new plugin.
This can be done using the open_basedir directive in our
/config/php/uncached.org.conf pool configuration. Here is my new
open_basedir definition:
php_admin_value[open_basedir] = /sites/uncached.org/:/config/misc/fail2ban/fail2ban.php
Don't forget to reload PHP-FPM after this change.
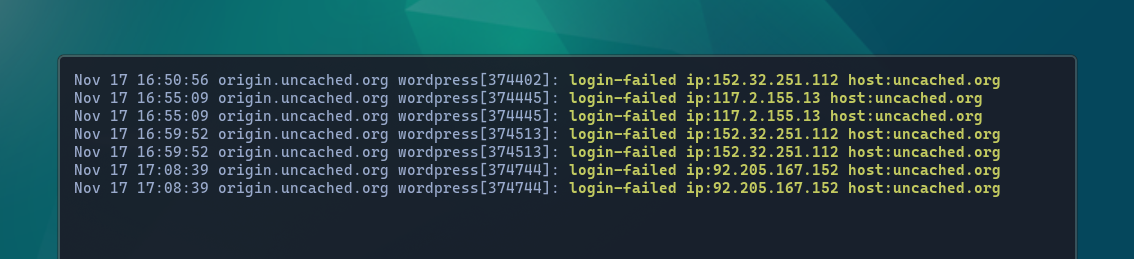
You can watch the auth.log file or the systemd journal using journalctl
while trying to log in with an invalid password:
journalctl -t wordpress -f
You can test an incorrect application password using curl:
curl -XPOST -u "karl:invalid" https://uncached.org/wp-json/
This should also generate a similar log entry.
Fail2ban jail/filter
We covered Fail2ban installation in an earlier lesson,
and configured it for our SSH service. Let's create a new jail called
wordpress-login in our existing /config/misc/fail2ban/jail.conf file:
[wordpress-login]
enabled = true
logpath = journal
journalmatch = SYSLOG_IDENTIFIER=wordpress
filter =
failregex = login-failed ip:<HOST>
action = dummy
This defines a new jail called wordpress-login. It reads the systemd journal
entries with the wordpress syslog identifier (this is the prefix we used in
the PHP code that writes the entry).
We can create a separate Fail2ban filter and reference it in a jail. Or we can
specify an empty filter, and write it inline using the failregex directive,
which for something as simple as this, is a great fit. The built-in <HOST>
placeholder expands to support IPv4 and IPv6 addresses.
We use the dummy action here to not actually ban any IPs just yet. This is
useful for testing. Let's restart Fail2ban and ensure our new jail is working:
sudo systemctl restart fail2ban.service
You can tail the Fail2ban log file while logging in with an incorrect password:
sudo tail -f /var/log/fail2ban.log
You can also see the dummy action in action:
sudo tail -f /var/run/fail2ban/fail2ban.dummy
Let's add some timing directives to the jail:
maxretry = 3
findtime = 300
bantime = 60
This will search 5 minutes worth of logs. If it finds a failure entry three times, it's going to ban the IP address for 60 seconds. While this is great for testing and prevents you from getting locked out for too long, in real production projects I tend to set this to less permissive numbers, especially on sites where users aren't expected to log in all that much.
Fail2ban actions
Fail2ban ships with a variety of existing actions, for different security configurations. In this course we're routing traffic from Cloudflare, and while our Nginx IP resolution (from the Cloudflare HTTP header) is correct, our server firewall has no way of knowing or blocking that IP, since it operates on a different level.
Our two best alternatives are to block the IP at the Nginx level, or at the Cloudflare WAF directly. Both actions already exist in Fail2ban, but require some additional setup and configuration.
Nginx block map
Fail2ban ships with an action called nginx-block-map. This allows us to create
and maintain an Nginx map with a list of blocked IP addresses, and takes care
of reloading Nginx when this list changes.
Note that the action itself doesn't implement any of the blocking. This will be
up to us to use that map in our configuration. Let's enable this action in our
jail.conf replacing the previous dummy action:
This article is for premium members only. One-time payment of $196 unlocks lifetime access to all existing and future content on wpshell.com, and many other perks.