Creating and maintaining a firewall configuration
A properly configured firewall is an important aspect of running any server, especially online. While we can secure certain services with tools like Fail2Ban, a firewall can help reduce the overall attack surface.
In this lesson we're going to enable and use UFW to expose certain ports on our system, while blocking all other traffic.

UFW
Historically firewalls have been tricky to deal with and it's not really worth
learning the complex iptables or nftables deeply if your only goal is to
open some ports and close others. This is where ufw comes in.
UFW or Uncomplicated Firewall is a
utility program that provides a more friendly interface between the user and
iptables and nftables. It is available by default on modern Ubuntu and
Debian Linux distributions.
First, let's enable UFW:
sudo ufw enable
This enables the firewall and makes sure it is still enabled when the system is rebooted. By default there shouldn't be any rules, so let's add some for our services:
sudo ufw allow 22/tcp
sudo ufw allow 443/tcp
This allows incoming traffic on port 22 for SSH services, and port 443 for HTTPS, where we'll ultimately serve our WordPress application.
We'll also need to update our default policies for incoming and outgoing traffic. Let's allow all outgoing, but block all incoming by default:
sudo ufw default allow outgoing
sudo ufw default deny incoming
You can confirm the current rules, policies and status with:
sudo ufw status verbose
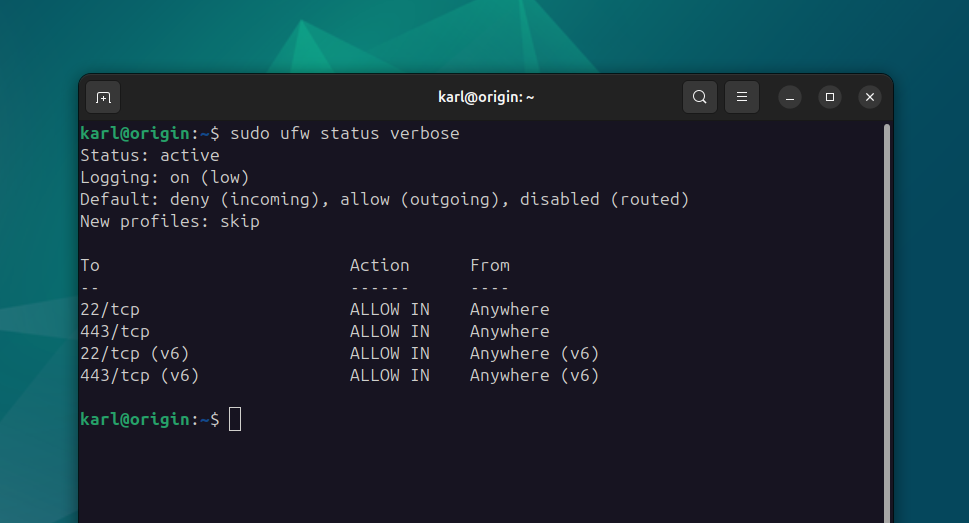
These simple rules significantly reduce the attack surface to just HTTPS and SSH services. Even if you make a configuration mistake in the future and open your Redis instance out to the public, the firewall will prevent anyone from actually accessing it.
The UFW manual has more simple and advanced examples if you want to lock things down even further.
Getting locked out
It is not uncommon to get locked out of accessing your server when configuring firewall rules. A simple mistake, wrong IP, or order of commands can all lead to kicking you out of your own server.
Unfortunately simply rebooting the server doesn't usually help as the firewall rules are persistent. If this happens to you, you will need to deal with this using your provider's recovery mode.
If you have KVM/VNC and can log on to the system directly, run:
sudo ufw disable
This often involves a root password reset, so don't forget to secure your
root account again if you do this. Other methods include setting ENABLED=no
in the /etc/ufw/ufw.conf file through a recovery environment, then rebooting
normally.
The /var/log/ufw.log file may have useful information for debugging too.
Version control
I like to keep my firewall rules under version control, especially when dealing
with specific IP addresses and networks. Here's an excerpt from my
/config/bin/firewall.sh script in my configuration repository:
#!/bin/bash

ufw --force reset

ufw default deny incoming
ufw default allow outgoing

ufw allow 22/tcp
ufw allow 443/tcp

ufw --force enable
ufw status verbose
Run this script using sudo bin/firewall.sh to reset and disable the firewall,
re-apply all rules, and enable again.
Note that for a short period between the reset and enable, your server will be
wide open. While this usually isn't a problem, it's best practice to add,
remove, and update rules using ufw commands directly while it is running, and
resort to a reset only when you need a clean slate.