Redis Object Cache for WordPress
In this lesson you will learn about Redis. You will install the Redis service on Ubuntu Linux and configure it as an in-memory cache. You will then set up the Redis Object Cache plugin for WordPress and verify that cached data persists across WordPress requests.
Note: This lesson covers the Redis object cache backend for WordPress. If you're looking to use Memcached, refer to the Memcached Object Cache lesson instead.
Redis is a very fast in-memory key-value store. It can be used as a persistent database, where all data is saved to disk and retained across service restarts. It can also be used as a non-persistent cache, where the data lives in memory only while the service is running.
This may be a bit confusing. Our goal is to get persistent object caching working for WordPress, meaning that data will persist across HTTP requests. However, we'll be doing that using non-persistent mode in Redis, where the data does not need to persist across Redis service restarts.
Installing Redis
The Redis server can be installed from official packages on most Linux systems, including Ubuntu and other Debian-based distributions:
apt install redis-server
The Redis configuration file lives in /etc/redis/redis.conf, which we'll move
to our /config repository for version control and symlink back to its original
place, where the Redis server will expect it:
sudo mv /etc/redis/redis.conf /config/misc/redis.conf
sudo ln -sfn /config/misc/redis.conf /etc/redis/redis.conf
The default configuration is mostly fine. However, there are a few adjustments we need to make in this file for better compatibility with our WordPress object cache:
save ""
maxmemory 1G
maxmemory-policy allkeys-lru
The default Redis configuration persists all data to disk. This is unnecessary
when using Redis purely as a cache. We disable writing Redis contents to disk
using the save option with an empty value.
Redis will use all available system memory by default, which is not the desired
behavior for caching. We use the maxmemory option to set a memory limit. We
also set the maxmemory-policy to allkeys-lru, which allows Redis to evict
the least recently used items when it needs to make room for new ones.
The exact value for maxmemory will depend on your server configuration and the
amount of resources available. I typically go for at least 128 MB for small
servers and 1 GB or more for servers with over 8 GB of total memory.
Note that the Redis service will be shared between all sites on the server, so you may need to allocate more memory when hosting a large number of sites. Also keep in mind that Redis will not allocate the maximum memory unless it is actually used, so for usage statistics it's best to rely on internal Redis metrics.
Don't forget to restart Redis when making configuration changes:
sudo systemctl restart redis.service
Let's use the redis-cli to ensure our service is running and our configuration
is applied:
redis-cli info
Look for maxmemory_human, maxmemory_policy, and the persistence section.
Redis Object Cache for WordPress
Now that we have a Redis service up and running, we'll need to make our WordPress site use it. First, we must ensure that PHP can communicate with our Redis server. This can be done in various ways, but the easiest is through the PHP extension.
This extension can be installed from PECL, but there's a packaged version
available for most Debian-based distributions, including Ubuntu Linux. We can
install it using apt:
sudo apt install php-redis
Verify that the extension is loaded in both CLI and FPM modes:
php -m | grep redis
php-fpm8.3 -m | grep redis
Next, let's install the Redis Object Cache plugin for WordPress, which works with the above extension and includes a neat CLI and GUI interface. There's also a commercial version of this plugin with some extra—but mostly unnecessary—features.
Since we have WP-CLI and the plugin is available on WordPress.org, we can install it directly on our server:
cd /sites/uncached.org/public_html
wp plugin install redis-cache
We can then activate the plugin and enable the object cache using the CLI:
wp plugin activate redis-cache
wp redis enable
There's a handy wp redis status command too, which I encourage you to explore.
The status and metrics are also available under the Settings → Redis menu in
the WordPress dashboard:
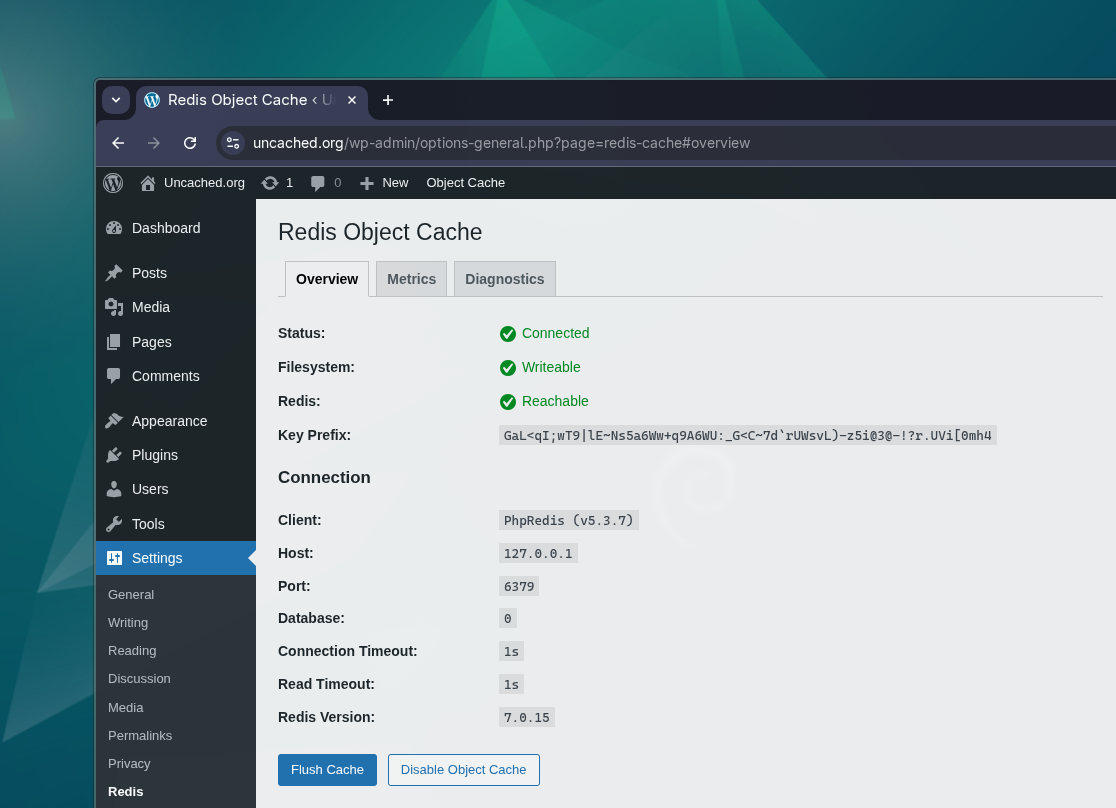
When enabling the plugin, it will generate a WP_CACHE_KEY_SALT for your
wp-config.php file. This salt is used as a prefix for all keys in Redis and
allows multiple sites to use the same Redis service. Alternatively, you can
define a unique WP_REDIS_DATABASE per site instead.
This article is for premium members only. One-time payment of $196 unlocks lifetime access to all existing and future content on wpshell.com, and many other perks.