Provisioning a dedicated server for WordPress with Cherry Servers
In this lesson I'll walk you through provisioning a dedicated server with Cherry Servers, a leading bare metal cloud provider with plenty of configuration options and flexible pricing.
Note: This course requires either a dedicated server or a VPS. If you're looking to provision a virtual server, see Provisioning a VPS instead.

Cherry Servers is one of my top picks for dedicated hosting. I've been using their platform for a long time for personal projects, and we also use them for our WordPress consulting customers at Koddrio.
There's plenty of available hardware options with each configurable even further. You can test out different specs using hourly billing, and if you're not ready to fully commit to a dedicated machine, their server outlet has entry-level servers for under $100/mo.
Create a Cherry Servers account
You can use this link to create an account with Cherry Servers,
hit the Sign up button on the top right. Note that this is an affiliate link
to Cherry Servers, which allows me to earn a small commission if you sign up.
If you'd rather not use my affiliate link, go to www.cherryservers.com directly.
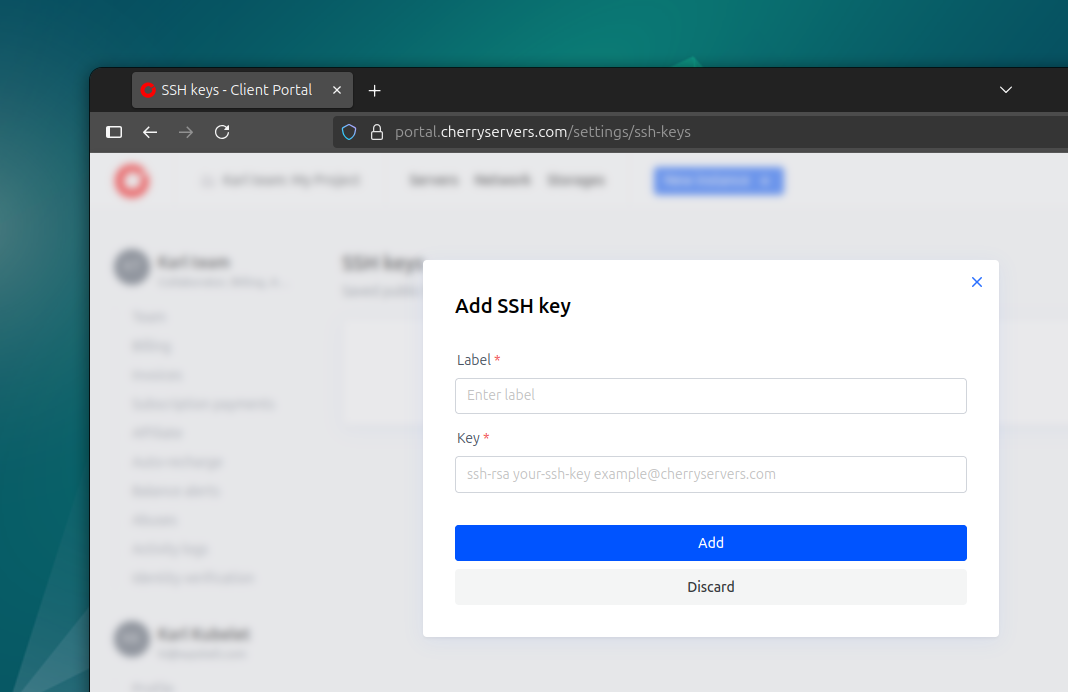
After signing up and verifying your email address, I recommend adding an SSH key. This will allow you to assign that key to new instances, so you won't have to juggle any passwords. Hit the user avatar on the top right and select User - SSH keys and click the Add button to add your key.
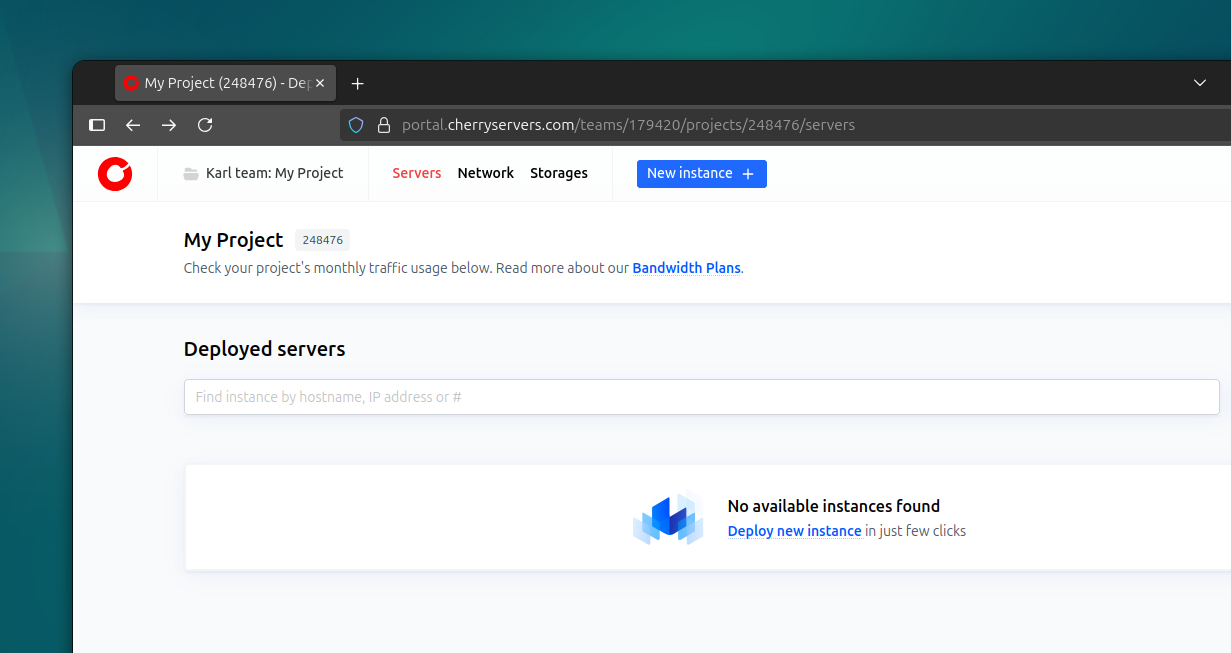
I also recommend updating your billing details at this point and adding a new card or topping up your balance to avoid any surprises. Hit the New instance button at the top to create your first server.
Deploy new server
On the Deploy New Server screen you'll need to select between Virtual or Dedicated servers. In addition to dedicated servers, Cherry Servers offers virtual servers with shared or dedicated resources. However, in this lesson we'll focus on dedicated server provisioning, so go ahead and select an option under the Dedicated Servers group.
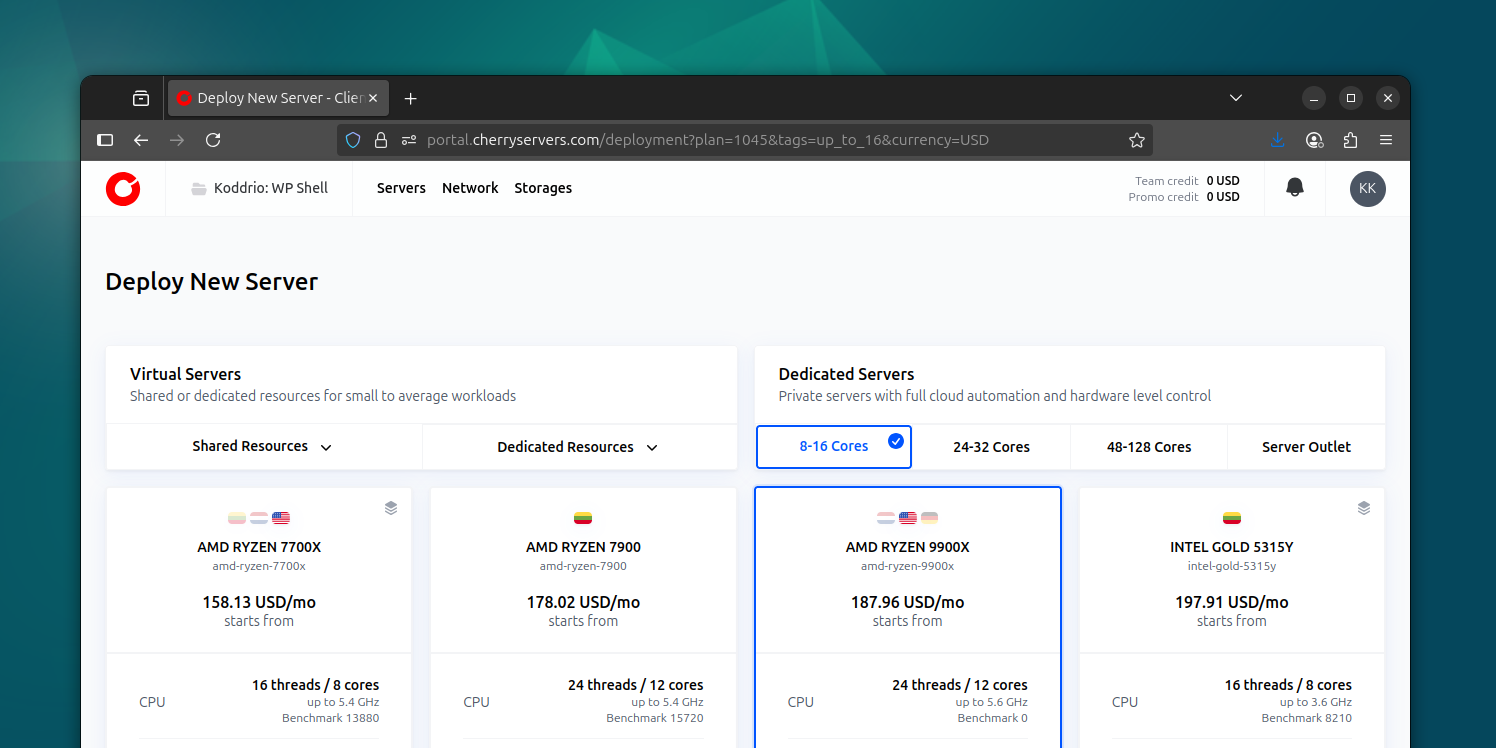
I'm going to pick the 8-16 Cores group and select the AMD Ryzen 9900X for this course, giving me 12 cores, 24 threads, with 96 GB of RAM and two 1TB NVMe drives. This is an absolute beast even for the most demanding WordPress, WooCommerce and LearnDash workloads. We'll run some benchmarks against this server in a future module too.
Many of the available options include a Geekbench 5 CPU benchmark score, which is great for comparing overall CPU throughput in multi-threaded workloads. For single-threaded scores I always refer to cpubenchmarks.net. For typical WordPress, WooCommerce and LearnDash workloads, you'll want to find a nice balance between single-threaded performance and core/thread count.
If you're looking for more affordable options, don't forget to check out the Server Outlet section. These are slightly less powerful variants, but if configured correctly, will still significantly outperform any equivalent VPS at any major cloud provider.
Region and hardware
After selecting a server spec, you'll need to select a region and the hardware configuration. Cherry Servers has a solid presence in Europe, Americas and APAC, though you may find that configurations often vary in different regions.
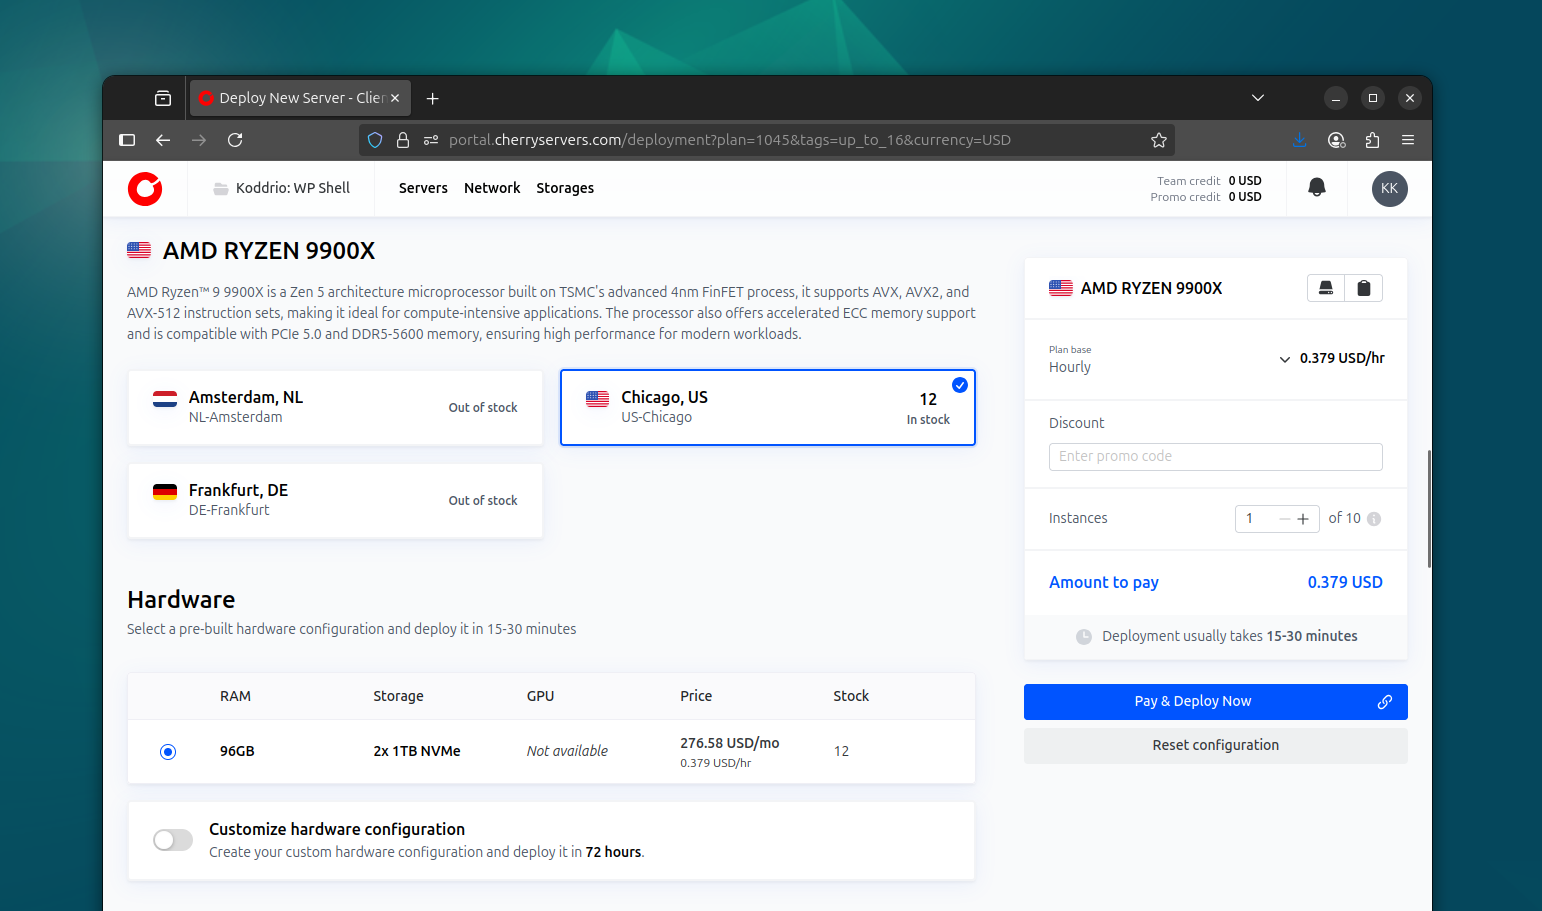
The Hardware section will have a list of pre-built configurations you can instantly deploy in the selected region. You can further customize this for a one-time setup fee.
OS image, storage & network
Next, you'll see a list of available OS flavors to automatically install on your new server. I'll pick Ubuntu 24.04 64bit, but you're welcome to explore other distros or self-install via KVM if you're feeling adventurous.

The Custom storage layout allows you to configure your disk and RAID setup. The defaults for most available servers are usually a good fit, though you'll want a smaller system partition or a custom layout if you're planning to run things like ZFS.
The Network section allows you to order a floating IP or subnet. We'll be routing our traffic via Cloudflare anyway, so we don't really need any of this, even if we end up migrating to another physical server or region.
Backup storage & SSH keys
Most server options include 100G of backup space which may come in handy for shuffling things around or quickly moving data between servers. We're not going to use this backup space in this course (we will still be doing both on-site and off-site backups).
Finally, in the Instances section you can configure the Hostname of your new server and give it an SSH key if you've added one before. Select your billing preference on the right and hit the Pay & Deploy Now button when you're ready.
IP address
If you've selected a standard configuration, it usually takes about 10 minutes to deploy the new server. You will get an email notification when it's done.
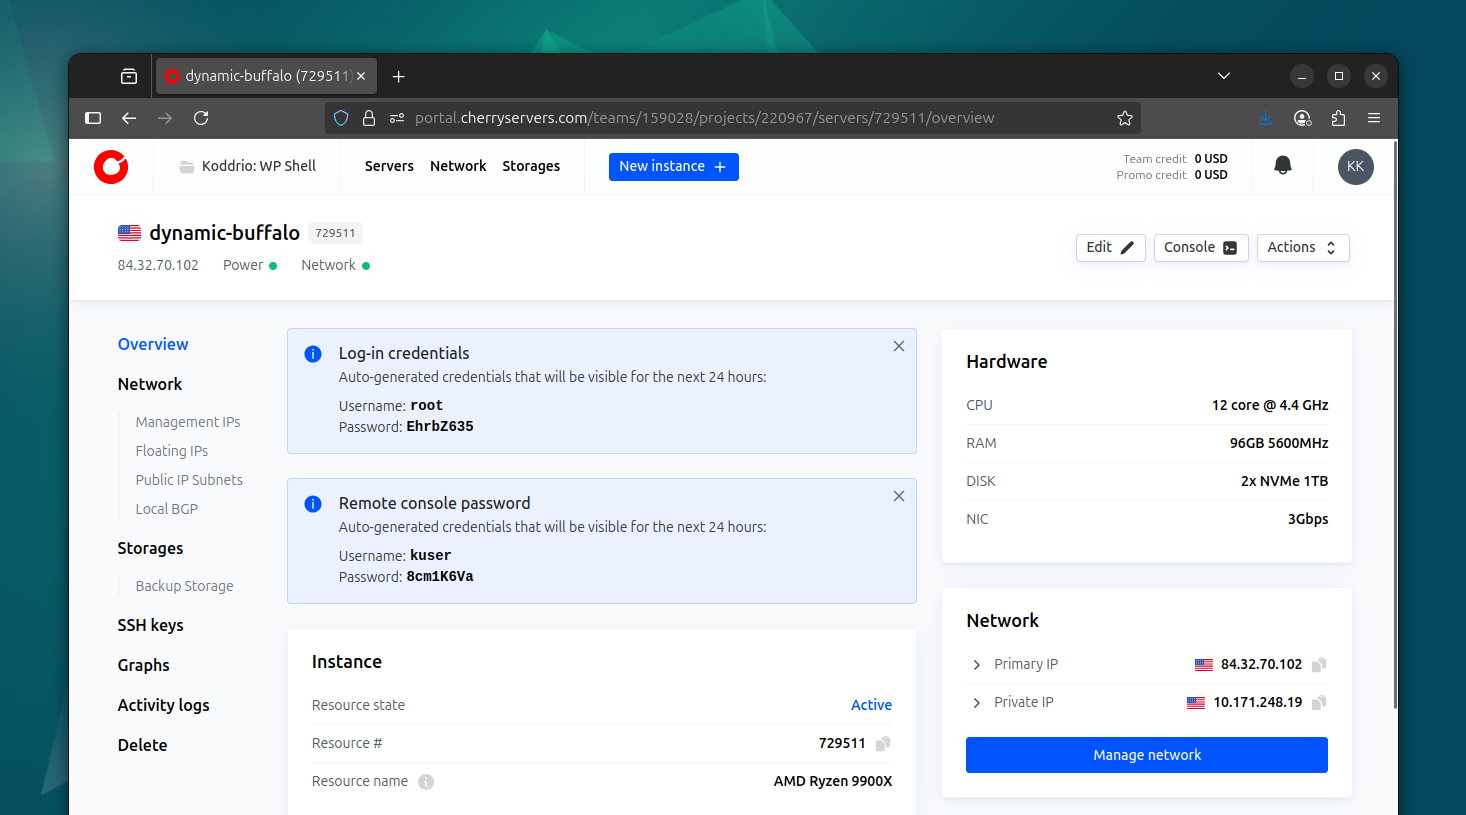
On the Overview page you'll see some login credentials for root and for
the remote console. You'll need to copy the root password if you haven't
provided an SSH key earlier.
In the right Network sidebar you'll see the Primary IP of this server. We'll use this IP address to set up our origin DNS records for further server configuration and management.
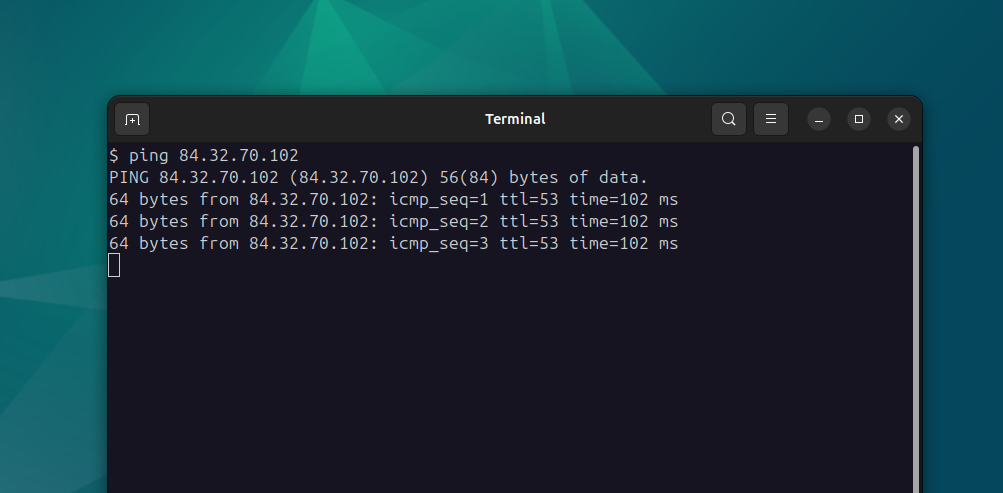
Let's go ahead and ping that IP to make sure it's online:
ping 84.32.70.102
There's plenty of other interesting things in the Cherry Servers panel too, which I encourage you to explore. Don't worry about breaking things at this stage, as you can always rebuild the server to its current empty state using the Actions - Rebuild option.